MW Web (HTML) Newsletter 1.1 Alt.
Basic Set-up for Mindwatering Custom Apps

1. Access Set-up
To implement this application, you must add it to either a Notes Client or a Domino Server. These instructions assume a Domino server.
a. Create a copy of the demo app (NSF) onto the Domino server.
- Open the app locally in the Notes client on the local Mac, Linux, or PC workstation.
- Create a new copy on the Domino server.
Note: This only works if you are allowed to do so by your administrator. We are assuming you are the administrator.
- File --> Application --> New Copy
- Choose the server. Update the app Title and file name / location as desired.
- Click OK
b. Update the ACL on the server.
About roles:
The application has two roles: [admin] and [staff].
The staff role gives users ability to maintain registrations w/in the application, and create and send newsletters.
The admin role gives additional ability for business owner users to create new categories for newsletters and add new groups of images for use in newsletters.
Make the following ACL changes:
- Give the LocalDomainAdmins and LocalDomainServers groups both roles and Manager access with all privileges.
- Give the average user of the app at least the [staff] role and Editor access to the application. Typically, we add them via a group or explicitly.
- Add the user Anonymous and give the access of "Readers", or the access of "No Access" with the ability to "Read Public Documents". (Needed for use to see Newsletter on-line w/images.)
- Change the -Default- user entry to "No Access" or "Reader" depending on your corporate standards of access.
Close and re-open the app or IBM Notes client(s) to experience the update access settings.
c. Sign the app.
- Using the Administrator client, locate the application and sign it.
Right click --> Sign --> Choose server and check the faster option.
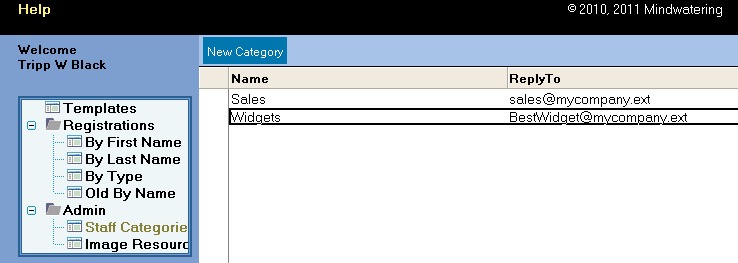
2. Create Newsletter Staff Categories
- Under Admin, select the Staff Categories view.
- Click the New Category button.
a. Complete the Name field with a group or type of newsletters.
b. Add the Reply to e-mail to be used with this category of newsletters.
c. Click Save.
d. Click Close.
Once you add your categories, you should have something like this:
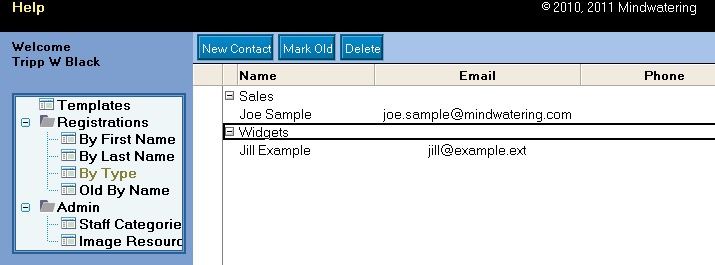
3. Add Test Registration Recipients
Note: One internal user, one web mail external user, one common hosted mail user
- Under Registrations, select a registrations view (e.g. By First Name or Type).
- Click New Contact.
- At minimum, complete the First Name, Last Name, Type, and E-mail Address fields.
- Click Save.
- Click Close.
After you add a couple registrations, you might have something like this:
4. Create a test Template for Sending Newsletter
a. Adding Images
Note: The images can be in any of 4 places.
- External public server, typically a folder within the corporate web site.
- Within the Image Resources designer location of this app - assuming this app resides on a public server.
It should, or deselect the option to View Online when creating Newsletters.
- Within the Image Resources view within the application.
We will assume this option, as it makes doing newsletters self contained and doesn't require a Designer software/license.
- Attached to each Newsletter.
This is typically is a good choice for complex scenarios where image reuse is nonexistent.
- Under Admin, select Image Resources.
- Click New Image File.
- Complete the New Image File document:
Unique Key Name: Widget20150110Mailing (Use a name that is descriptive of the images attached. Some of our docs are global logos/headers, and some may be for a specific newsletter promotion.)
File Attachment: <attach all the JPGs, GIFs, or PNGs you are planning to use>
Internal Notes: <enter any notes that assist you in remembering what images goes with what newsletters or when to use the images on this resource document.>
- Click Save.
Note the base path of the images is now populated. This is the path you use within the newsletter HTML.
- Click Close.
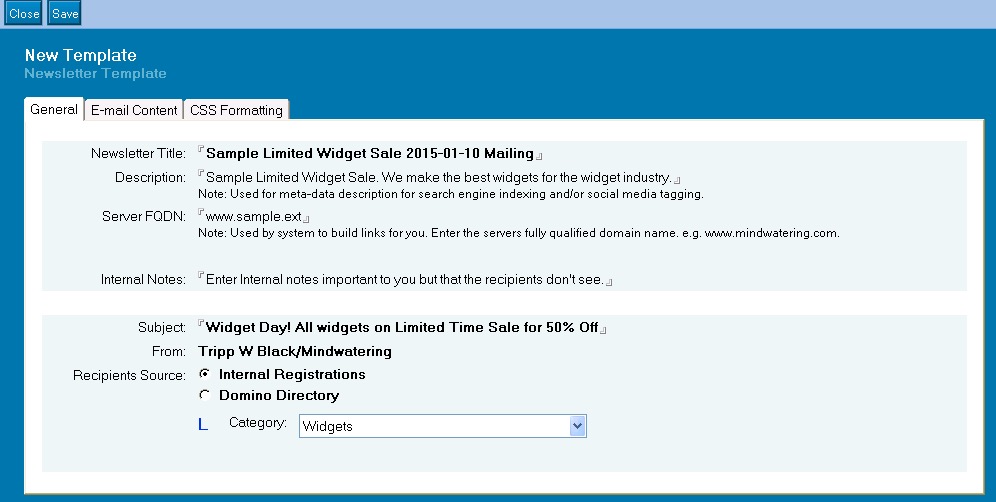
b. Create a new Newsletter promotion.
- Select Templates in the menu.
- Click New Newsletter.
Example below:
- Complete the General tab.
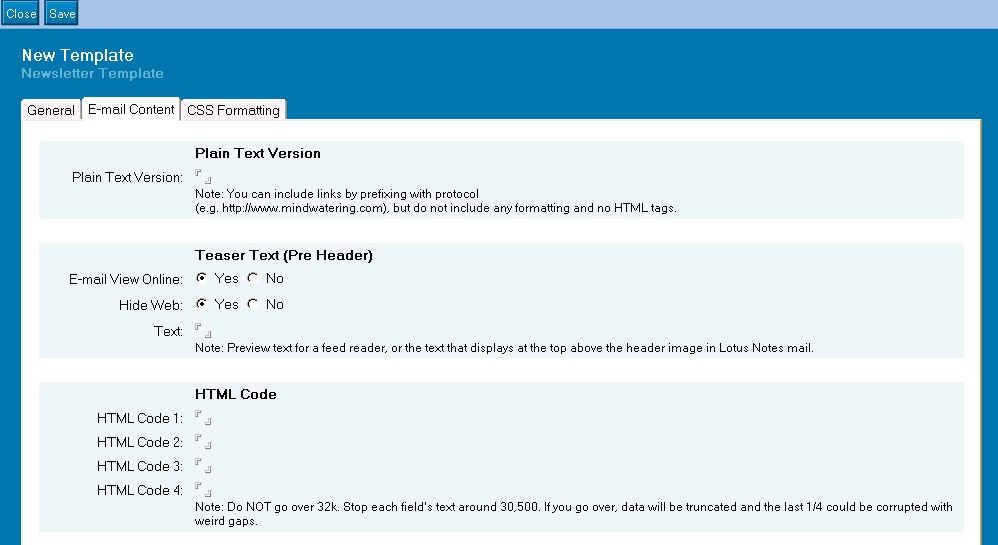
- Complete the E-mail Content tab:
Notes:
Plain Text Version - Enter the plain text version for web-mail clients and really old mail programs which don't support HTML / MIME mail.
Teaser Text (Pre Header) - The Teaser Text is for a feed reader or the text that displays in the header of an e-mail client, assuming the client supports it.
HTML Code - The HTML Code section is where you include your HTML code. Note that you have four sections of code. Split your code up for longer newsletters. Each code block must NOT exceed 32k in size. CSS can either be included within the HTML or entered in the CSS Formatting tab. If you use the CSS Formatting tab, you'll need to use certain CSS tags to be compatible. Most of us do our CSS in-line, just to make sure that the CSS is loaded by the mail client.
Most of the container HTML code is already handled by the template and the General and CSS Formatting tabs. You only need to include the HTML of the ad itself.
 Sample Code Sample Code
The gray code is the code that the template creates automatically. The code in red is pasted into the 4 HTML code fields.:
________________
<!DOCTYPE html>
<html>
<head>
<meta http-equiv="Content-Type" content="text/html; charset=UTF-8" />
<!-- Facebook sharing information tags -->
<meta property="og:title" content="201504 - Regional Schools of the Supernatural and Seers and the Yearly Glory Event: Heaven Touching Earth #8" />
<meta property="og:description" content="Elijah list advertisement" />
<meta property="og:type" content="article" />
<title>201504 - Regional Schools of the Supernatural and Seers and the Yearly Glory Event: Heaven Touching Earth #8</title>
<style type="text/css">
/* Client-specific Styles */
#outlook a{padding:0;} /* Force Outlook to provide a "view in browser" button. */
body{width:100% !important;} /* Force Hotmail to display emails at full width */
body{-webkit-text-size-adjust:none;} /* Prevent Webkit platforms from changing default text sizes. */
/* Reset Styles */
body{margin:0; padding:0;}
img{border:none; font-size:14px; font-weight:bold; height:auto; line-height:100%; outline:none; text-decoration:none; text-transform:capitalize;}
#backgroundTable{height:100% !important; margin:0; padding:0; width:100% !important;}
/* Template Styles */
body, #backgroundTable{
background-color:#ffffff;
}
#templateContainer{
border: 0px solid #dddddd;
}
h1, .h1{
color:#000000;
display:block;
font-family:Helvetica,Arial; font-size:28px; font-weight:bold;
line-height:100%;
margin-top:0; margin-right:0; margin-bottom:10px; margin-left:0;
text-align:left;
}
h2, .h2{
color:#000000;
display:block;
font-family:Helvetica,Arial; font-size:22px; font-weight:bold;
line-height:100%;
margin-top:0; margin-right:0; margin-bottom:10px; margin-left:0;
text-align:left;
}
h3, .h3{
color:#000000;
display:block;
font-family:Helvetica,Arial; font-size:14px; font-weight:bold;
line-height:100%;
margin-top:0; margin-right:0; margin-bottom:10px; margin-left:0;
text-align:left;
}
h4, .h4{
color:#000000;
display:block;
font-family:Helvetica,Arial; font-size:12px; font-weight:bold;
line-height:100%;
margin-top:0; margin-right:0; margin-bottom:10px; margin-left:0;
text-align:left;
}
#templatePreheader{
background-color:#ffffff;
}
.preheaderContent div{
color:#000000;
font-family:Helvetica,Arial;
font-size:10px;
line-height:100%;
text-align:left;
}
.preheaderContent div a:link, .preheaderContent div a:visited{
color:#0000ee;
font-weight:normal;
text-decoration:underline;
}
.preheaderContent img{
display:inline;
height:auto;
margin-bottom:10px;
max-width:600px;
}
#templateHeader{
background-color:#ffffff;
border-bottom:0;
}
.headerContent{
color:#000000;
font-family:Arial;
font-size:10px;
font-weight:bold;
line-height:100%;
padding:0;
text-align:center;
vertical-align:middle;
}
.headerContent a:link, .headerContent a:visited{
color:#0000ee;
font-weight:normal;
text-decoration:underline;
}
#headerImage{
height:auto;
max-width:600px !important;
}
#templateContainer, .bodyContent{
background-color:#ffffff;
}
.bodyContent div{
color:#000000;
font-family:Helvetica,Arial;
font-size:10px;
line-height:100%;
text-align:left;
}
.bodyContent div a:link, .bodyContent div a:visited{
color:#0000ff;
font-weight:normal;
text-decoration:underline;
}
.bodyContent img{
display:inline;
height:auto;
margin-bottom:0px;
max-width:575px;
}
#templateFooter{
background-color:#ffffff;
border-top:0;
border-bottom:0;
}
.footerContent div{
color:#000000;
font-family:Helvetica,Arial;
font-size:9px;
line-height:150%;
text-align:left;
}
.footerContent div a:link, .footerContent div a:visited{
color:#0000ee;
font-weight:normal;
text-decoration:underline;
}
.footerContent img{
display:inline;
max-width:575px;
}
</style>
</head>
<body>
<center>
<table border="0" cellpadding="0" cellspacing="0" width="100%" id="backgroundTable">
<tr>
<td align="center" valign="top">
<!-- begin preheader -->
<table border="0" cellpadding="10" cellspacing="0" width="320" id="templatePreheader">
<tr>
<td valign="top" class="preheaderContent">
<!-- begin standard preheader -->
<table border="0" cellpadding="10" cellspacing="0" width="100%">
<tr>
<td valign="top">
<div mc:edit="std_preheader_content">
</div>
</td>
</tr>
</table>
<!-- end standard preheader -->
</td>
</tr>
</table>
<!-- end preheader \\ -->
<table border="0" cellpadding="0" cellspacing="0" width="320" id="templateContainer">
<tr>
<td align="center" valign="top">
<!-- begin template header -->
<table border="0" cellpadding="0" cellspacing="0" width="320" id="templateHeader">
<tr>
<td class="headerContent">
<!-- template header image -->
</td>
</tr>
</table>
</td>
</tr>
<tr>
<td align="center" valign="top">
<!-- template body section -->
<table border="0" cellpadding="0" cellspacing="0" width="320" id="templateBody">
<tr>
<td valign="top" class="bodyContent">
<!-- begin body content -->
<table border="0" cellpadding="20" cellspacing="0" width="100%">
<tr>
<td valign="top">
<div id="body_content1">
<div class="mwadcontainer">
<table class="hdrlogo" style="width: 598px; max-width: 598px; text-align:center; background-color:#000000;">
<tr><td>
<a href="http://www.customerdomain.ext" target="_blank"><img src="http://myserver.mindwatering.com/Folder/App.nsf/0/1234UNIDOFDOC4321/$File/MW_MainHeader.jpg" alt="Mindwatering Customer" style="padding:0px; width:598px; height:151px; max-width:598px; border:0px;" /></a>
</td></tr>
</table>
<table style="border: 1px solid #000000;">
<tr>
<td class="mwadbody" style="width: 598px; max-width: 598px; text-align: center; background-color: #eeeeee; padding:0px;">
<table class="mwadheadertable">
<tr>
<td style="width: 8px;"></td>
<td class="mwadheader" style="width: 562px; max-width: 562px; padding: 8px; background-color: #ffffff; border: 1px solid #bababa; margin: 8px auto 0px auto; border-radius: 8px; ">
<h1 style="font-size: 18pt; color: #ff0000; text-align: center;">Title of Great Event <br/>That Revolutionizes Your Live</h1>
<p style="font-size: 12pt; line-height: 16pt; text-align: justify;">
<span style="color:#ee0000;">MW Customer Company</span> is pleased to announce the wonderful new opportunity to partner with us and perform amazing sales this quarter. For a limited time, you can partner with us for this amazing service offering that will revolutionize your revenue potential.
</p>
<p style="font-size: 12pt; line-height: 16pt; text-align: justify;">
We invite you to meet with us for this exciting training and enablement during our annual <span style="color:#ee0000; font-style:italic;">Most Amazing Conference Ever</span>. We have invited some amazing speakers to reveal their business secrets to succeed beyond expectations! These powerful gatherings can help activate you to develop your sales gifting and to understand the nuances of business discernment and the working and movement of the business leaders that affect your business forecasts.
</p>
</td>
<td style="width: 8px;"></td>
</tr>
</table>
<table class="mwadevent">
<tr>
<td style="width: 8px;"></td>
<td class="kogheader" style="width: 562px; max-width: 562px; padding: 8px; background-color: #ffffff; border: 1px solid #bababa; margin: 8px auto 0px auto; border-radius: 8px; ">
<a href="http://myserver.mindwatering.com/Folder/AmazingEventDoc" target="_blank"><img src="http://myserver.mindwatering.com/Folder/App.nsf/0/1234UNIDOFDOC4321/$File/MWFINAL_EventPromo.jpg" style="border:0px;" alt="Customer Conference Business Revolution" /></a>
<p style="font-size: 12pt; line-height: 16pt; text-align: justify;">
<span style="color:#00ae00; font-style:italic; font-weight:bold;">Customer Conference Business Revolution</span>, with Business gods, Joe and Bob, and so many more, is coming May 7th through 10th to the new Somewhere Business Center. Get your tickets now!
</p>
</td>
<td style="width: 8px;"></td>
</tr>
</table>
</td>
</tr>
</table>
</div>
</div>
</td>
</tr>
</table>
</td>
</tr>
</table>
<!-- end template body section -->
</td>
</tr>
<tr>
<td align="center" valign="top">
<!-- begin template footer section -->
<table border="0" cellpadding="10" cellspacing="0" width="320" id="templateFooter">
<tr>
<td valign="top" class="footerContent">
<table border="0" cellpadding="10" cellspacing="0" width="100%">
<tr>
<td valign="top" width="100%">
<div id="footer_contentcopyright">
<em>Copyright © 2015 Mindwatering and King of Glory Ministries, All rights reserved.</em>
<br />
</div>
</td>
</tr>
<tr>
<td valign="top" width="100%" valign="middle" id="utility">
<div id="footer_contentunsubscribe">
</div>
</td>
</tr>
</table>
</td>
</tr>
</table>
</td>
</tr>
</table>
<br />
</td>
</tr>
</table>
</center>
</body>
</html>
- end sample code -
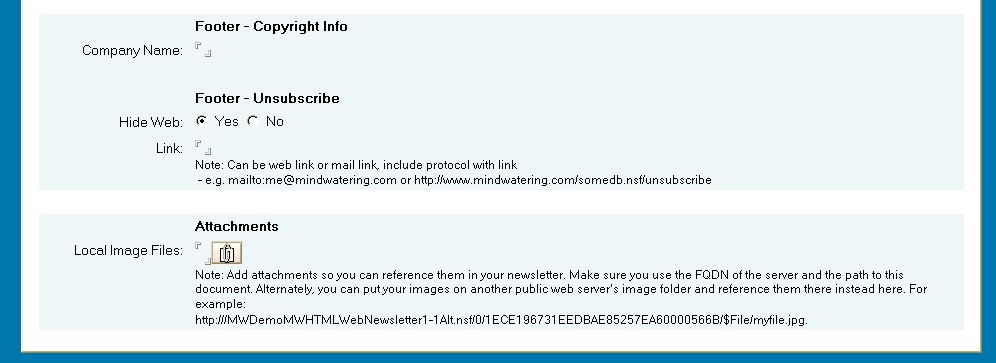
Footer Copyright Info - Enter either just the company name and copyright or add HTML for the section if the copyright includes links, etc.
Footer Unsubscribe - Choose Yes, to give the user an unsubscribe link at the bottom of the e-mail that's separate from the HTML Code entered above. Because just about every client that Mindwatering has, wants to do subscriptions differently, this feature is not included in the base template design.
Attachments - If you are not doing images elsewhere, this is where you attach "this" newsletter's image files.
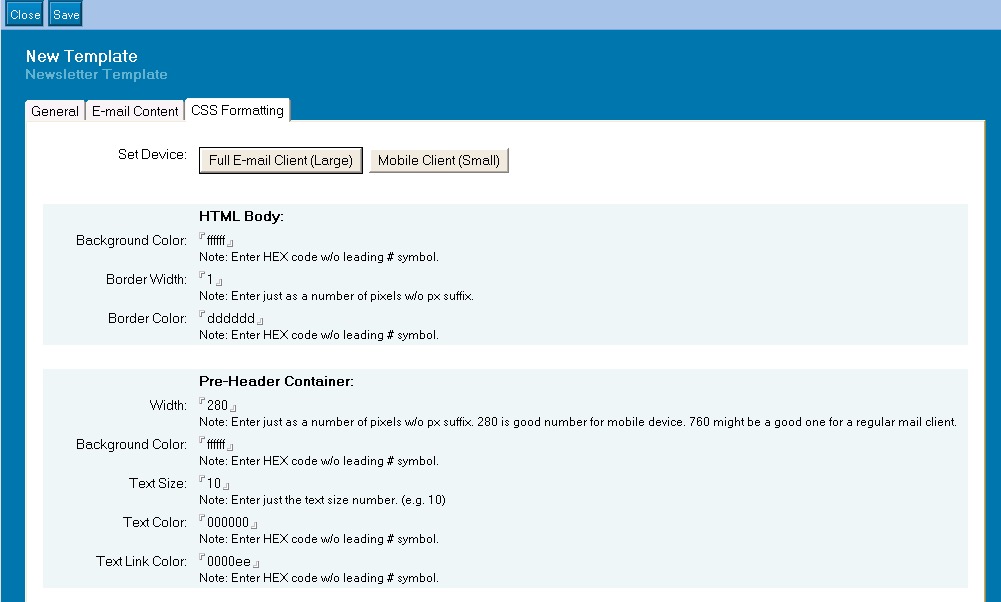
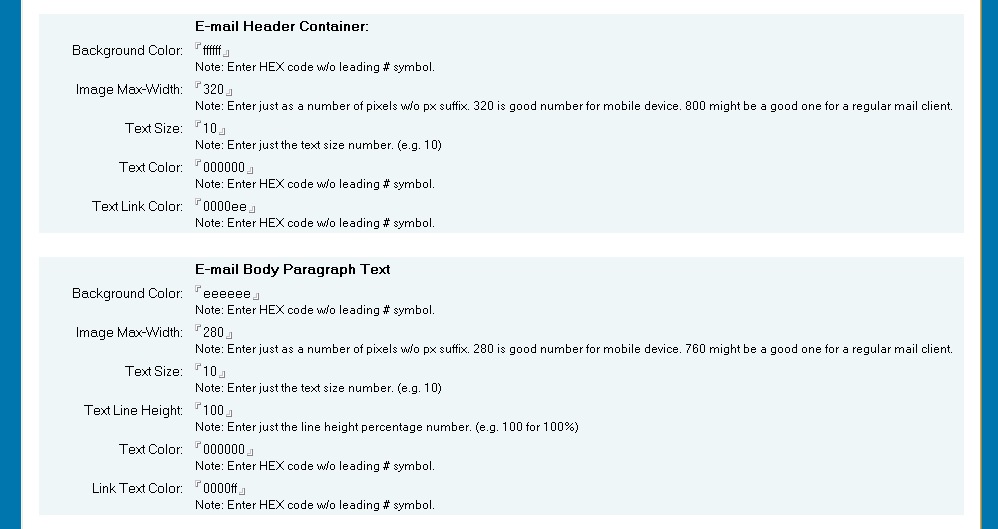
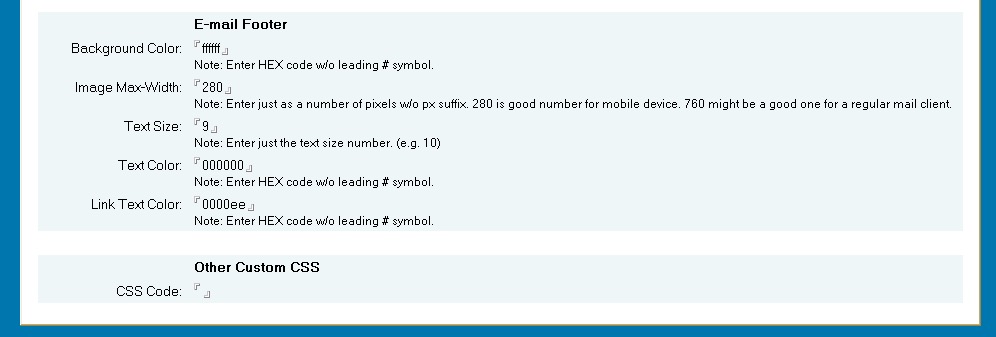
- Complete the CSS Formatting tab.
Notes:
The Set Device buttons are used to set defaults for large format clients vs small format devices (e.g. iPhone).
Use this tab only if you are not embedding the styles within the HTML Code.
- Click Save.
Note the base path of the images on the newsletter is now populated. This is the path you use within the newsletter HTML.
- Click Close or click Send if you are ready to send your new newsletter.
Note:
We STRONGLY recommend that you create a test group (Type) and send the newsletter to the test group first. Verify all images and links are working as intended. Then come back, switch the Type to the real recipients, and click Save, and then Send.
previous page
|